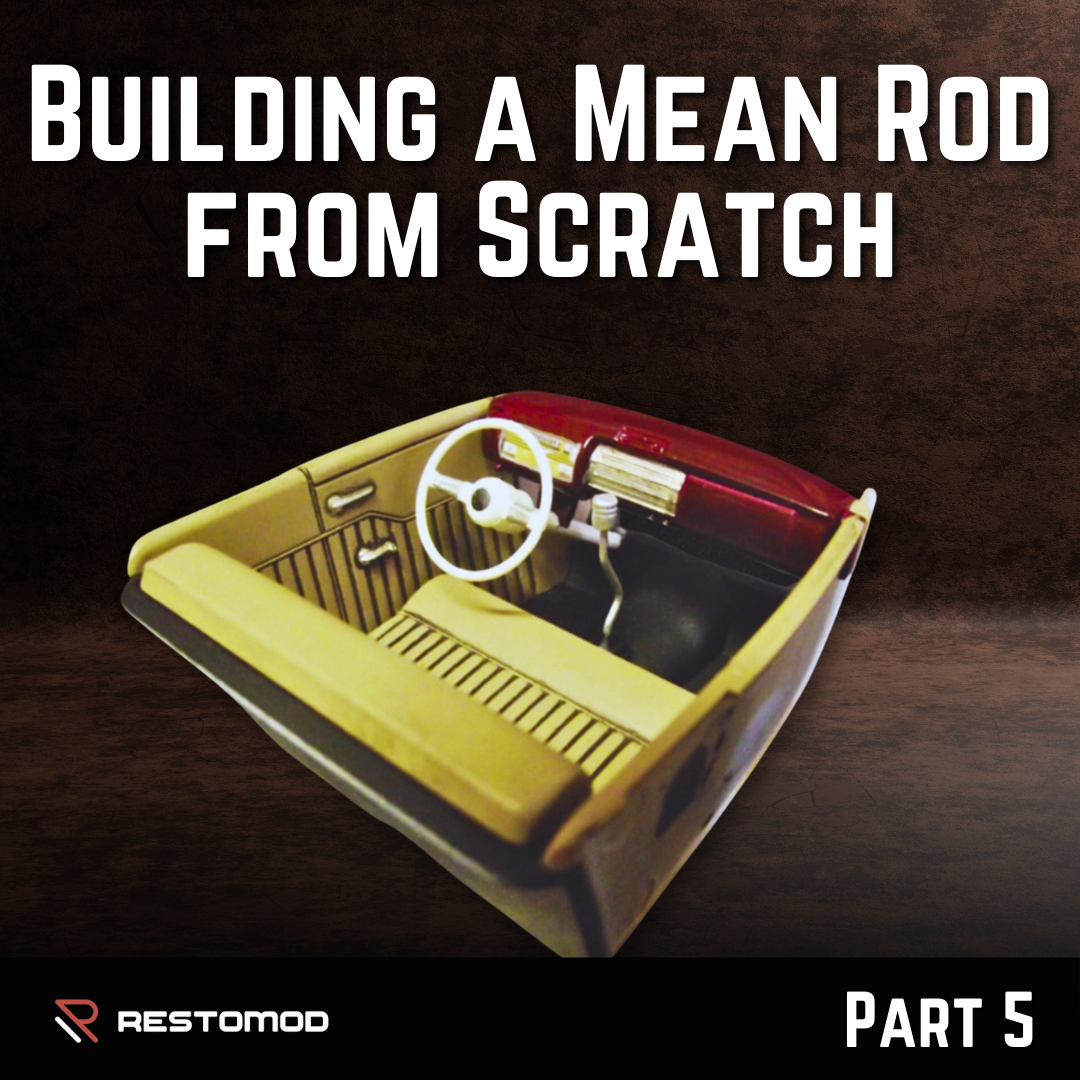
Welcome back to our rod-building saga! In this instalment, we’ll focus on painting and completing the interior of the Deuce, one of the most customizable and detailed parts of the kit. With various dashboard and steering wheel options, you can truly make this interior your own. Let’s get started!
What You'll Need:
- Tamiya Maroon paint
- Tamiya Racing White paint
- Tamiya USAF Vietnam Tan paint
- Dark brown watercolor
- Tamiya Titanium Silver paint
- Tamiya Rubber Black paint
- Tamiya Satin Clear spray
- Semi-gloss black paint
- Fine-tipped silver permanent marker
- No. 00 paintbrush
- Wide soft brush
- Lint-free cloth
Step-by-Step Instructions
Step 1: Choose Your Dashboard and Steering Wheel
The Deuce offers two dashboard options:
- Stock 1932 Dashboard with custom gauge decals (white lettering on black faces or black lettering on white faces).
- Stock 1940 Ford Dashboard with three decal options (one stock and two custom).
For the steering wheel, you can choose between:
- A stock 1940 Ford steering wheel.
- A modern 3-spoke billet steering wheel.
In this build, I chose the 1940 Ford dashboard with the stock gauge cluster and the 1940 Ford steering wheel. As I used the vintage Hemi motor with a manual gearbox, I removed the automatic column shifter and opted for the custom gear lever with a piston knob.
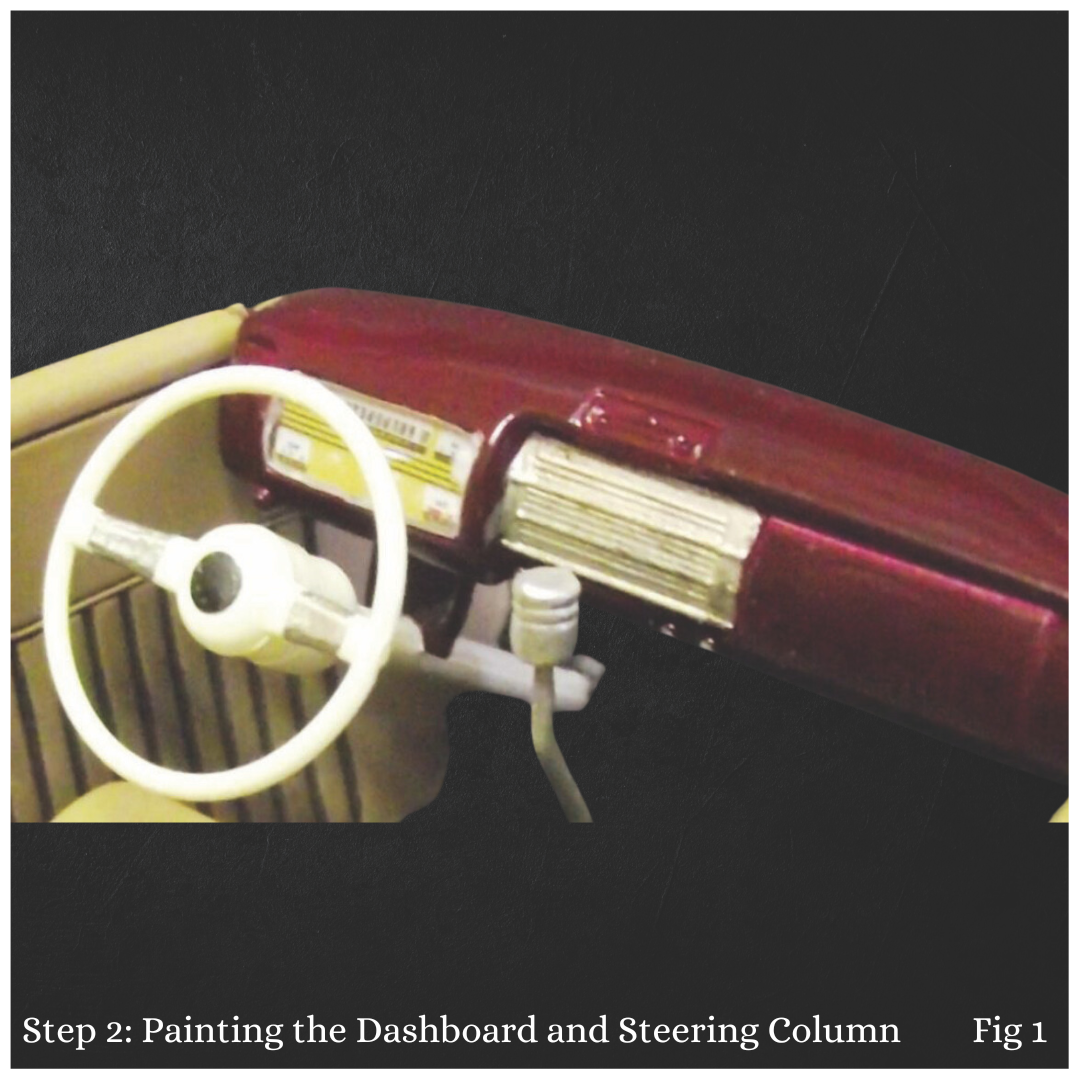
Step 2: Painting the Dashboard and Steering Column
Fig 1: I painted the dashboard with Tamiya Maroon for a rich colour. The steering column was painted in Tamiya Racing White. I used a fine-tipped silver permanent marker to quickly pick out the details, such as the knobs on the dashboard and the chrome insert on the steering wheel. The hooter button was painted semi-gloss black for a polished look.
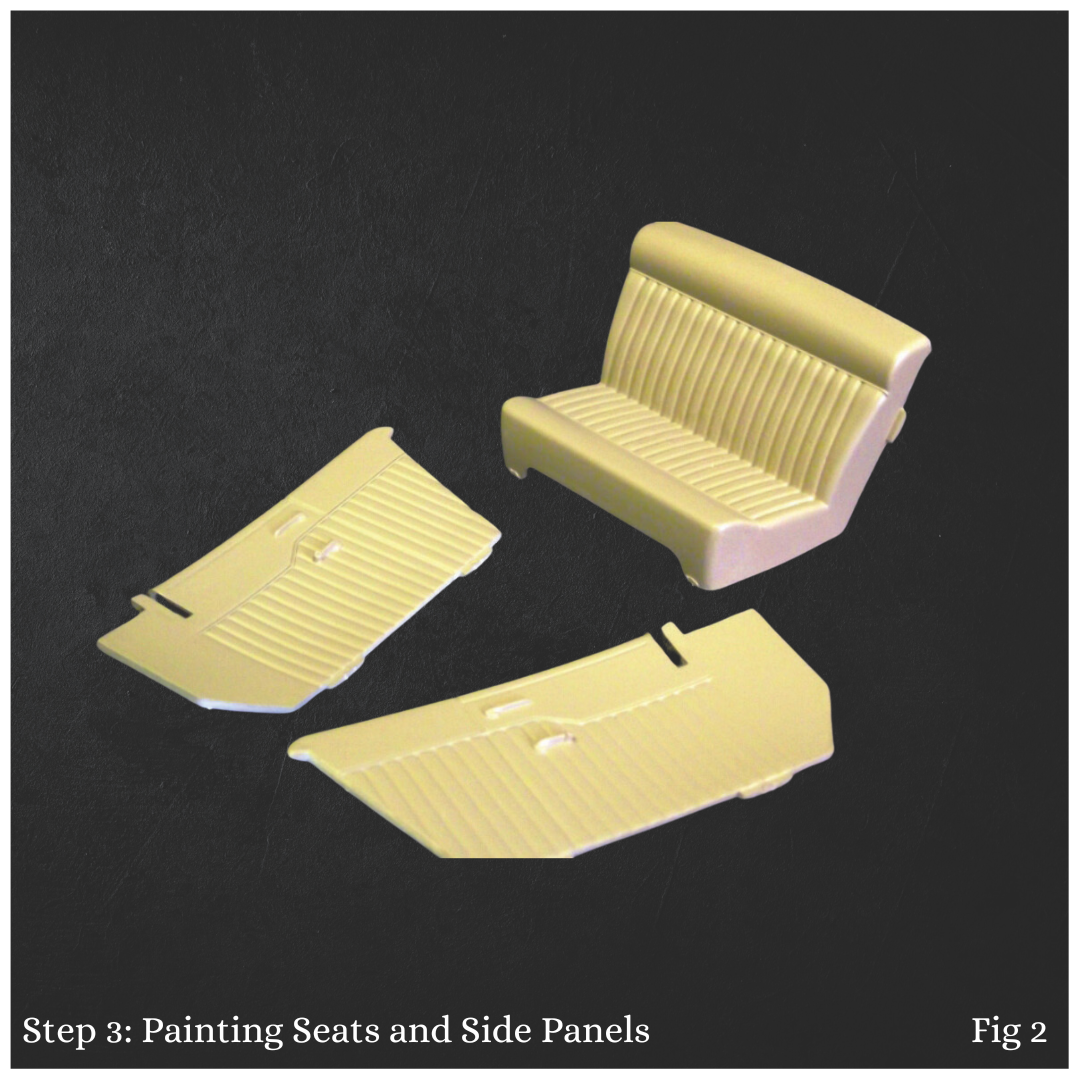
Step 3: Painting Seats and Side Panels
Fig 2: The seats and side panels feature traditional tuck & roll pleats and come with moulded manual window winders and door handles. I painted these components with Tamiya USAF Vietnam Tan for a classic appearance.
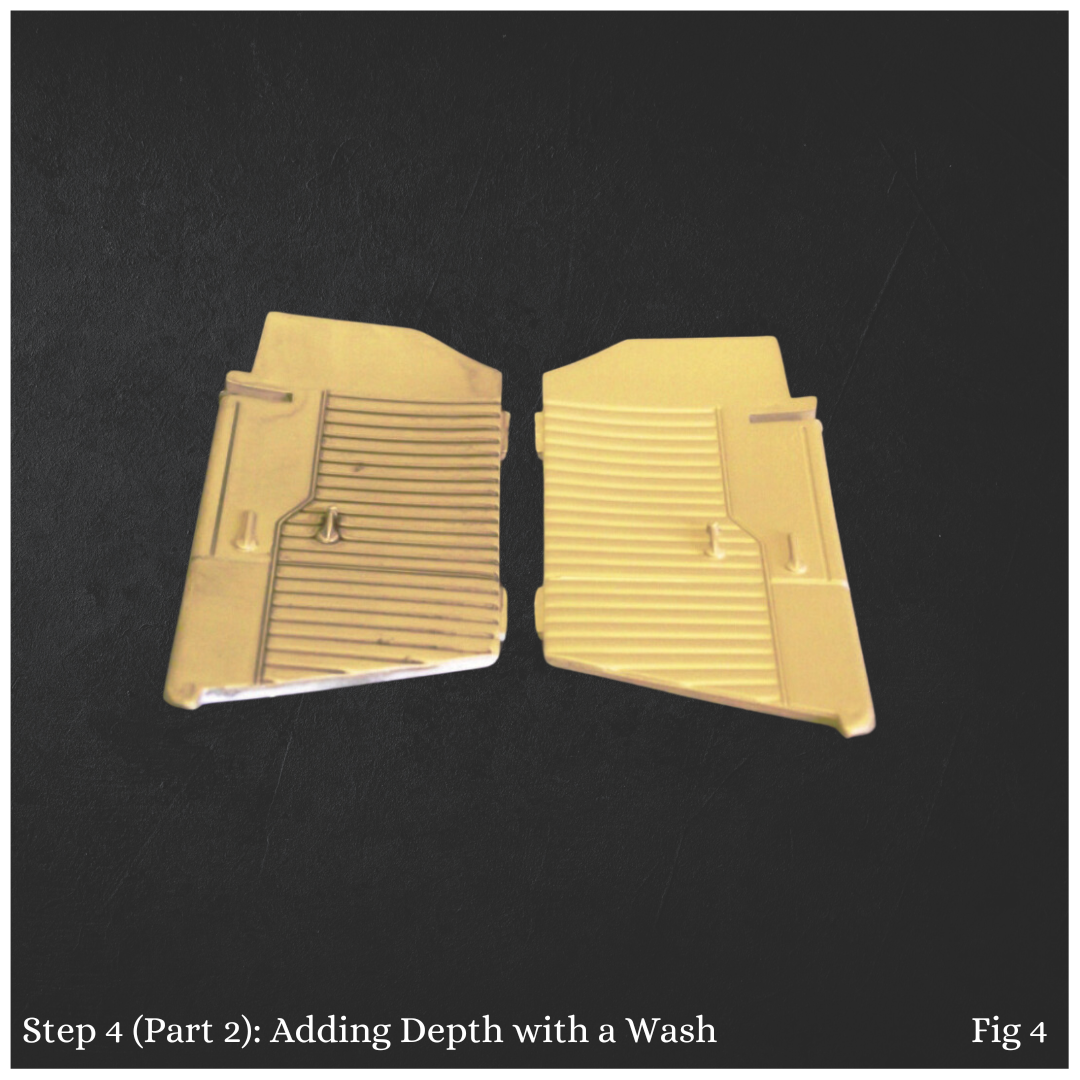
Step 4: Adding Depth with a Wash
Fig 3: To enhance the moulded details, I created a wash using dark brown watercolour mixed with water. I applied this wash generously with a wide soft brush, ensuring it settled into the recessed areas without worrying about it covering the raised details.
Once the wash dried, I wiped the excess off the raised areas with a slightly damp lint-free cloth. This technique highlights the intricate details beautifully. Fig 4 shows the difference between the washed panel and a straight-painted panel. Don't forget to wash the seat at the same time!
Step 5: Detailing Window Winders and Door Handles
Once the wash was complete, I used Tamiya Titanium Silver and a No. 00 paintbrush to detail the window winders and door handles, giving them a polished look. Fig 5 displays the completed side panel and seat.
Step 6: Painting the Interior Floor
Next, I painted the interior floor Rubber Black to simulate cheap rubber carpeting. I also opened up the flashed-over hole in the transmission tunnel for the manual shifter. Once the floor dried, I attached the side panels and seat according to the instructions.
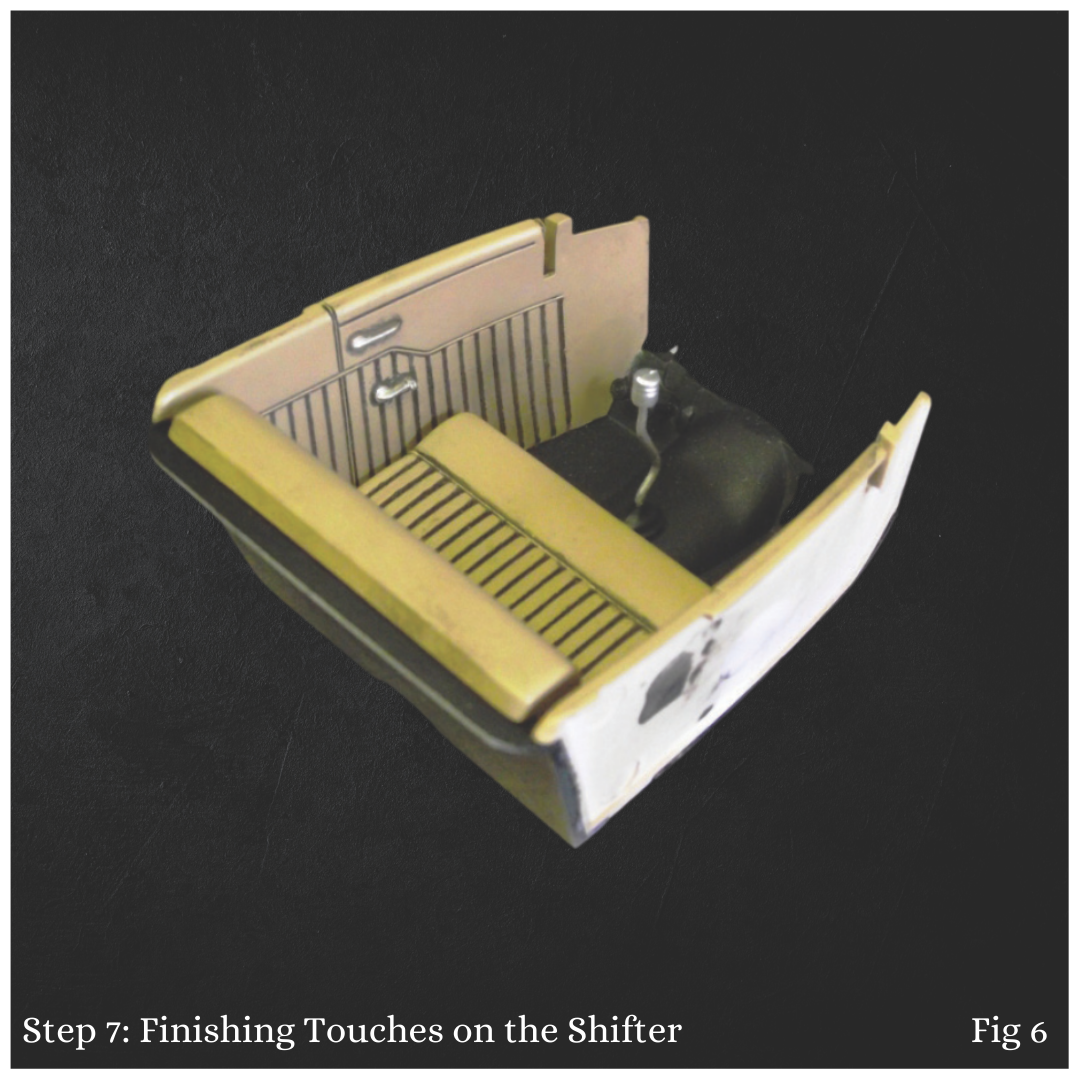
Step 7: Finishing Touches on the Shifter
I gave the chrome-plated shifter and knob a coat of Tamiya Satin Clear to tone down the shine and mimic polished aluminium. After it dried, I detailed the shifter boot with semi-gloss black and installed the shifter. Fig 6 shows the interior with the completed shifter.
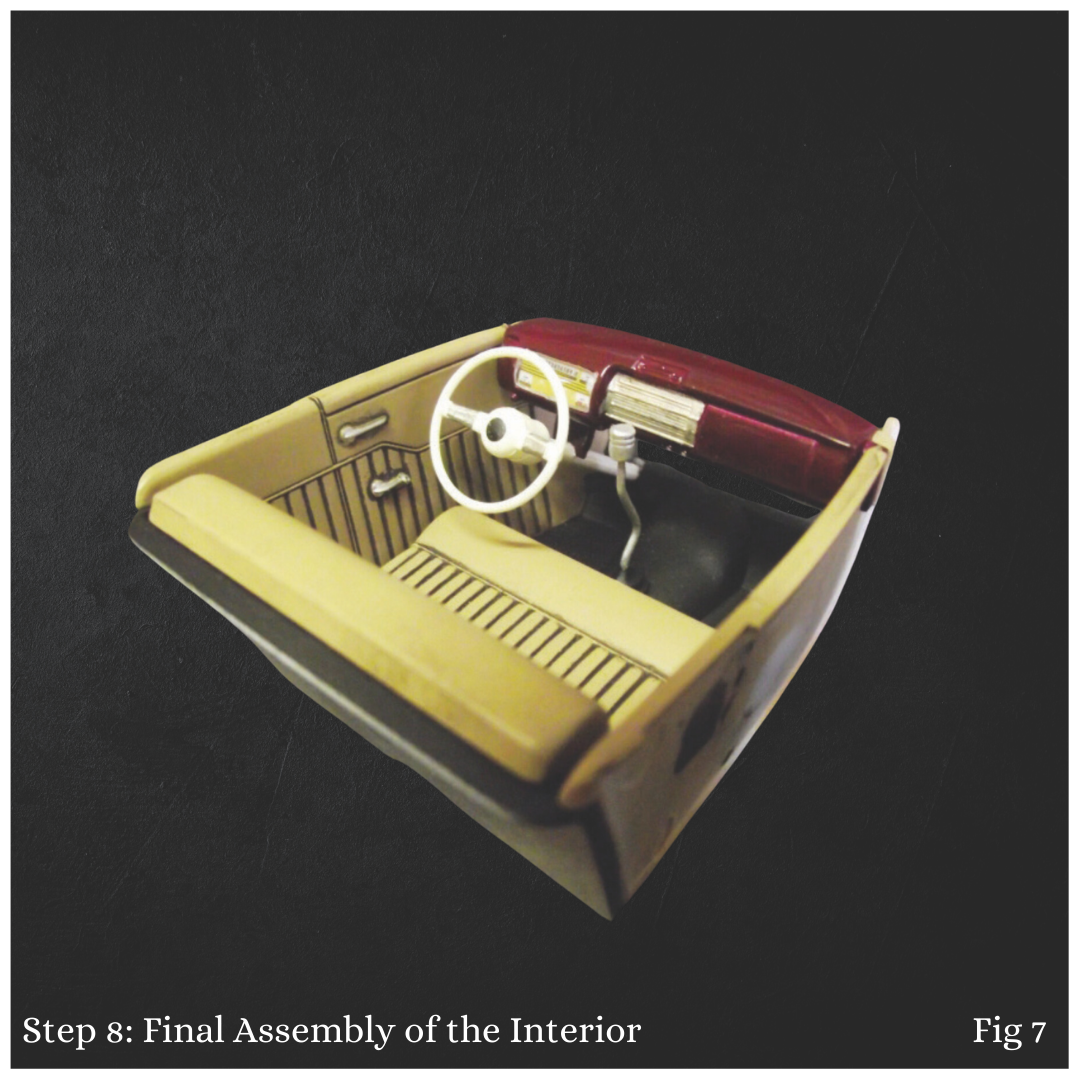
Step 8: Final Assembly of the Interior
Finally, I added the painted dashboard, steering column, and steering wheel to complete the interior. Fig 7 shows the finished interior, bringing the Deuce to life with a polished yet classic look.
What’s Next?
In the next issue, we’ll conclude the Deuce saga with the final assembly and detailing of the model. Stay tuned for more exciting tips and techniques to elevate your rod-building skills! Happy modelling!
Share Your Progress
We’d love to see how your project is coming along! Send us your build photos, and feel free to ask any questions you have along the way. We’ll feature select builds and answers in future articles.